As an Administrator you can enable and disable charities. Being apart of the platform you have access to more than 200 charities in which you can manage.
Once you enable charities you can label them with the causes that your company supports.
To manage these charities follow instructions below:
- Start by switching from "Employee" view to "Company Admin" view
- On the 'Employee Home Page' click “Switch View” at the top of the screen
- Select “Company Admin” from drop down menu. You will be re-directed to the page below

- Select “Settings” in the navigation tab on the left hand side of the screen

- You will be re-directed to the page below

- Select the “Charities” logo

- You will be re-directed to a page similar to the one below. This page contains all the charities that are both enabled and disabled on your platform.

- To filter and find particular charities you can either search them in the search tab or scroll through the full list of charities. See image below for reference

1.Set up
- When you created a new account on Catalyser, your charities are disabled by default.
- To enable them, you need to add one cause at least and then click on the “Disabled” button to switch the status. See image below for reference

- Once you have clicked "Disabled" the charity will become visible and thus enabled. See image below for reference. This charity has just been enabled

- To add a cause click on the box underneath the title "Causes". A drop box will appear. Select a cause/s that aligns with the particular charity

- At the moment, you cannot yet add a charity yourself. If you would like to add a charity, please send an email to admin@catalyser.com.
2.Monitoring
- Start on the charities page as seen below

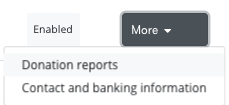
- You can monitor the transactions for each charity by clicking on "More" that corresponds with the selected charity followed by clicking on “Donation Reports”
| Version 21/1/20 |
|---|